Here comes a time for many skiers, who have reached a certain point in their skiing abilities and experiences, when they yearn to expand the skiing experience. Maybe you’re tired of battling crowds, paying for lift tickets, the repetition of familiar runs, and skiing tracked-out snow. Maybe you’re searching for some solitude, a better workout, or simply a new challenge and a different on-snow experience.
With the explosion of ski films over the past few years, the allure of backcountry skiing has reached a broader audience; but, hand in hand with the rise of ski film production companies like Teton Gravity Research, Matchstick Productions, Powderwhore, and Sherpas Cinema has come a wave of high profile skier deaths and injuries in the backcountry—from Marc Andre Belliveau’s spine-ravaging fall in 2006, to the loss of ski-BASE jumping pioneer Shane McConkey in 2009, and most recently, Jamie Pierre, the holder of the record for the highest cliff jump on skis, who perished this fall in an early season avalanche in Utah.
The considerable peril to life and limb is not the only hurt you face when you decide to take up backcountry skiing—it can also be debilitating for your personal finances. Anybody who has ever taken the family up for a day of resort skiing can tell you that skiing ain’t cheap. If you go backcountry, just because you are no longer shelling out for lift tickets and lodge lunches doesn’t mean you will be saving money.
First, there’s the gear: at the very least, you’re going to need an avalanche beacon, probe, and shovel. You might also need new skis to handle the bottomless powder you’re searching for, and you will need a way to get up to or into the backcountry, which likely means climbing skins, Alpine Touring (AT) bindings, and AT boots; or, if you’re a snowboarder, snowshoes, or a split board with skins.
Then, there are the trips. This is where you might see some “savings,” because there are plenty of places to go for free (if you know what you’re doing), or at least for the minimal cost of a guidebook, map, compass, and maybe a snowpark permit. On the other hand, your backcountry trips might be the biggest drain on your wallet, with options ranging from a reasonable splurge on a day of guided backcountry touring to the full-blown dream heli-skiing experience, which might end up costing you more than you spent on your house. Of course, if you can afford that kind of trip, you probably live in a slightly larger house than most of us OTM writers.
But once you decide to go backcountry, you open yourself up to its many rewards and wonders. The majesty of the forest covered in untouched snow. The adventure of route-finding and skiing challenging terrain. The spectacular scenery you will encounter—if the weather holds. The camaraderie of touring with a group of like-minded souls. The satisfaction of earning your turns by hiking up the hill. There are a multitude of ways for skiers and snowboarders to expand their personal sport into the backcountry, with no standard skill level or set of gear required. However, it is paramount that you understand the risks and are prepared for the journey.
GEARING UP
The first thing you should acquire for your journey into the backcountry is knowledge. “Out back” is a different world than what you might be used to—even after years of skiing on the varied slopes of our five local resorts. You will need to know what you are getting into, including the threats posed by avalanches and other terrain hazards, what kind of gear you will need, where to find local powder stashes, and a healthy dose of emergency preparedness.
“Even strong resort skiers can sometimes get overwhelmed or surprised when they get out in the backcountry,” says Eric Ryan, Backcountry Ski Committee chair of the Spokane Mountaineers. “Be prepared to have your experience be a little different from what you’ve experienced in the ski resort.”
AVALANCHE SAFETY
There are many avalanche awareness learning opportunities in the region. In Spokane, REI and Mountain Gear offer avalanche awareness classes that range from free informative sessions to multiday and more costly certification courses (dates and specific class information can be found on their respective websites). In addition, the Spokane Mountaineers (spokanemountaineers.org) offer a suite of courses and trips designed “to give people a place to start if you want to get into backcountry skiing,” says Ryan. “There’s a lot of wisdom you can gain from going out with people who’ve been out there for a long time, and the Mountaineers have a longstanding reputation for education in outdoor recreation.”
The Mountaineers offer an introductory avalanche safety course each year. This year’s course, scheduled for January 21-22, will be taught by Kevin Davis of the Idaho Panhandle Avalanche Center. The class includes two sessions: a classroom session on Friday night at REI and a Saturday field session on Mt. Spokane, where students learn how to use a beacon and assess snow safety. However, “if you want to get serious,” says Ryan, “you need to get a Level One certification.”
Mountain Gear is offering a Level 1 Avalanche course January 11-12, taught by Shep Snow— “arguably one of the best snow safety instructors out there,” says Mark Beattie of Mountain Gear. The course includes a classroom day at Mountain Gear and one day on snow (usually at Schweitzer).
Avalanche safety accreditations come in several forms. The Canadian Avalanche Association (CAA, www.avalanche.ca) is an excellent resource for us in the Inland Northwest, with our neighbors to the North offering a multitude of snow safety courses just across the border. CAA also offers an online course, which provides an introduction to snowpack fundamentals, avalanche terrain, trip planning, and rescue techniques. There are several American organizations offering avalanche certifications, as well, including the American Institute for Avalanche Rescue and Education, the American Association of Avalanche Professionals, and the National Ski Patrollers.
As for avalanche safety gear, the key components are an avalanche beacon or transceiver, a probe, and a shovel—all of which are used to locate and dig out an avalanche victim. Beacons are the most expensive and significant component. Beacon technology is standardized across the industry, so all beacons will work together in a rescue situation; but there is a significant amount of variance in features and capabilities. “Find me” models, which typically have one or two antennas with weaker signal pick-up capabilities, will work fine if you’re buried, but might make it more difficult to find a buried friend if you’re the one on top of the snow. Patroller models, on the other end of the spectrum, typically feature two to three antennas, a longer signal range, and special features for multiple burial situations.
Do your research: user reviews on sites like backcountry.com and blogs like wildsnow.com are forums for discussion, and don’t forget your local experts. Mountain Gear, for example, has knowledgeable sales people and a wide selection of beacons.
BACKCOUNTRY SKILLS AND ACCESS
To earn your turns, you’ll need ski gear that allows you to access remote powder stashes. The methods vary widely, from snowshoes to snowmobiles, but the most common are Alpine Touring (AT) setups or Telemark skis.
An AT setup consists of the following: (1) Skis—technically, just about any ski could work, but you’ll probably want something at least 90mm under foot to handle the powder you hope to find.
(2) AT bindings, which allow you to switch between touring and skiing modes. Touring mode releases the heel so you can ski uphill Nordic style, while skiing mode locks in the heel so you descend in a traditional Alpine style.
(3) Climbing skins, which attach to the bottom of the ski for the hike up, providing traction on the ski’s slippery base so you don’t slide backward with every step.
You will also probably want AT boots, which are more flexible and lighter than traditional Alpine ski boots—making your slog uphill just a little bit easier. Also, many AT bindings are not compatible with Alpine boots, so if you’re not buying new boots, make sure the bindings you get are compatible with the boots you have. If you already telemark ski, lucky you! You only need climbing skins!
If you snowboard, you might choose to use snowshoes to access the backcountry, simply carrying your board. Another option is a split board: a snowboard that, yes, splits in half lengthwise to make planks that resemble very fat skis, mounted with special bindings that rotate to give you a Nordic stance for the climb up, and rotate back to regular or goofy when you reach the top, lock your board together, and one-plank it down the hill. You’ll also need climbing skins, like your AT buddies.
Mountain Gear features a wide selection of AT, Telemark, and Backcountry Touring (lighter than AT skis, with a patterned base for traction, eliminating the need for climbing skins) skis for rent, so you can try out some gear before you invest in a setup of your own.
Once you’ve got the gear, you’ll need to learn how to use it. In addition to their avalanche safety course, the Mountaineers also offer a backcountry ski school, which covers some avalanche safety information as well as what gear to use, tips and tricks shared by experienced skiers, and a guided first trip down the backside of Mt. Spokane. This class is scheduled for January 10 and 14, and costs $10 for members. Anyone who wants to take the classes are welcome, but membership in the Mountaineers is encouraged and, with membership costs running around $35 annually, the Mountaineers courses are a steal compared to some of the other local options.
Spokane is also situated within a day’s drive of several private backcountry huts, many of which offer courses both in avalanche safety and backcountry ski skills. For example, skiers who are just getting into the backcountry can take Wallowa Alpine Huts’ “New to Backcountry Skiing” trip, which focuses on teaching and practicing backcountry travel techniques, including transitions (where you switch your equipment from uphill mode to downhill) and up-track techniques such as how to turn a corner climbing uphill on skis. “That’s the weakest skill most people have—the uphill movement,” says Wallowa Alpine Huts proprietor Connelly Brown. They’ll even show you how to remove your skins without taking off your skis.
VENTURING OUT
Here in the Inland Northwest, we have a slew of backcountry opportunities within a day’s drive, for costs ranging from a tank of gas to thousands of dollars.
ON A BUDGET
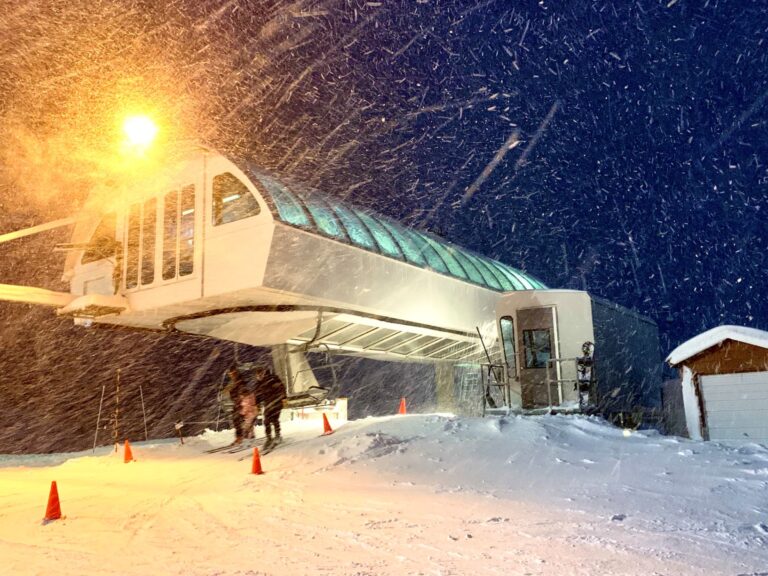
Once you’ve shelled out for gear and classes, it may be that the last thing you want to do is fork out a couple grand for a backcountry ski experience. Good news! There are plenty of opportunities to get out back for minimal costs. Nearly all of our local resorts have easily accessible backcountry terrain, with or without purchasing a lift ticket. One way to start your backcountry adventures is by exploring the sidecountry: ski the backside or the powerline route at Mt. Spokane; duck through one of the backcountry access gates at Schweitzer; or take a hike from Lookout Pass into the surrounding public land.
Members of the Mountaineers who are geared up and ready to venture beyond class-style trips can join one of the handful of local trips that the club organizes each year. “We try to make them as open as possible,” Ryan says, so that the trips can provide a forum for club members to meet like-minded skiers of similar ability levels, who often initiate excursions in addition to the club’s organized trips. The club also maintains an email list, so members can reach out to other skiers to organize ad-hoc trips when the conditions are favorable.
“Usually we have a pretty good mix of people on the trips,” Ryan says. “Some older folks who want to try something new, or younger folks who finally got to a point where, like I was when I started, they’re out of college, have a few bucks in pocket, and are able to get some new gear to explore the backcountry.”
Destinations for Mountaineers trips include the area around Lookout Pass, including St. Regis Basin, Steven’s Peak, and Boulder Basin near Mullan, ID. “They’re within a day’s drive, and it’s a little work to get in there, but it’s some of the best skiing,” says Ryan. Other local spots include Sherman Pass (north of Colville) and Kootenay Pass, which is right across the U.S./Canada border.
Leaders of the trips are members of the club who’ve been skiing for a long time and volunteer to lead a trip or two. “It passes down,” Ryan says, “for me, it’s just become a normal winter routine to share my experiences with those who want to learn. Once you get into the backcountry community, there’s so much opportunity to do more trips.”
If you’re not a member of the club, you can create your own adventure. Online forums and route books can serve as resources once you’re ready to start choosing your own routes. The book 100 Classic Backcountry Ski and Snowboard Routes in Washington by Rainer Burgdorfer is one good option, though most of the routes are in the Cascades. Backcountry Ski! Washington: The Best Trails and Descents for Free-Heelers and Snowboarders by Seabury Blair, Jr. includes routes in the Okanagan. Many snowshoe routes can also be done as backcountry ski tours.
WILLING TO SPLURGE
In addition to providing backcountry gates, Schweitzer Mountain also hosts the Selkirk Powder Guides, which runs guided snowcat and snowmobile tours in the Schweitzer backcountry and abutting Priest Lake State Forest Land. Instead of putting your money toward a new AT setup, consider spending it on a day or two with Selkirk Powder Guides—they’ll help you navigate the avalanche terrain, find the freshest powder, and shuttle you to the top of the ridge so you get several runs in a day, with no hiking required. Two days with these guys costs you less than an avalanche safety certification and an AT set up, and lets you get a taste of the back side without necessarily risking it all—SPG’s experienced team of guides should keep you out of trouble.
Another option for backcountry skiers who want to get out there without blowing out their wallets is a hut trip. Huts can be any number of types of accommodations—from yurt-style tents to rustic cabins to small, remote ski lodges—which can be rented and used as a base camp for a few days of ski touring. One option from Spokane is Wallowa Alpine Huts (WAH, wallowahuts.com), located in northeastern Oregon. The company operates two “huts”—in this case, yurts—McCully Basin and Norway basin, each of which sleeps up to ten powderhounds on three-night or four-night trips. You can choose a self-service trip, where you hike in to the yurts and spend the days route finding and touring with prices starting at $200 per day, plus a first-day mandatory guide ($250) if it’s your first time visiting WAH. Or you can choose a guided, catered trip, where you can be shuttled to the yurt by snowmobile, along with provisions, and accompanied by a guide who can help you find the best and safest routes. They also offer options at several price points in between and optional services including catered meals, porter services, and snowmobile shuttles to and from the yurts.
Connelly Brown, the self-described “owner, operator, chef, porter, guide, witch doctor” of WAH says, “the specialty we’re famous for is the deluxe trip—it’s guided, catered; everything’s taken care of so the guests can relax. Our guests often recognize the value of having logistics managed and the local knowledge of the terrain and snow pack. For some people, figuring all that out is part of the experience, but for others who are on holiday time they appreciate the efficiency.”
There’s no specific requirement for skiing prowess or safety skills at WAH and most backcountry touring options, but hut operations typically don’t rent the ski and safety gear you’ll need. Brown says “most people have their own gear or people who are new to the sport rent in town before they come out.” Most hut trip skiers are advanced skiers, but tours can include intermediate skiers, and on occasion, Brown says, relative beginners. “Those beginners are a courageous lot, because there’s so much effort to get to the skiing; if you’re going to be falling down the hill you’ve got to ask yourself if it’s really worth it.” The majority of WAH customers have many years of experience skiing the lifts and are looking to build on that experience, he says.
Inland Northwest backcountry skiers can also enjoy the resources of the Backcountry Lodges of British Columbia Association (www.blbca.com), a network of nearly 30 privately-owned backcountry operations in British Columbia—a half dozen of which are located within a five-hour drive of Spokane. Prices for self-guided tours generally begin around $1,000 per person per week, with options to add catered meals or guide services.
Whatever your pleasure, and whatever your budget, there are backcountry skiing opportunities to suit a variety of skiers and snowboarders. Says Brown: “There’s something magical about powder skiing. You don’t have to share the slopes. Skiing groomers—you can do that anywhere. But powder only comes to certain ranges—it’s unique to the Western states and the interior mountain ranges.”