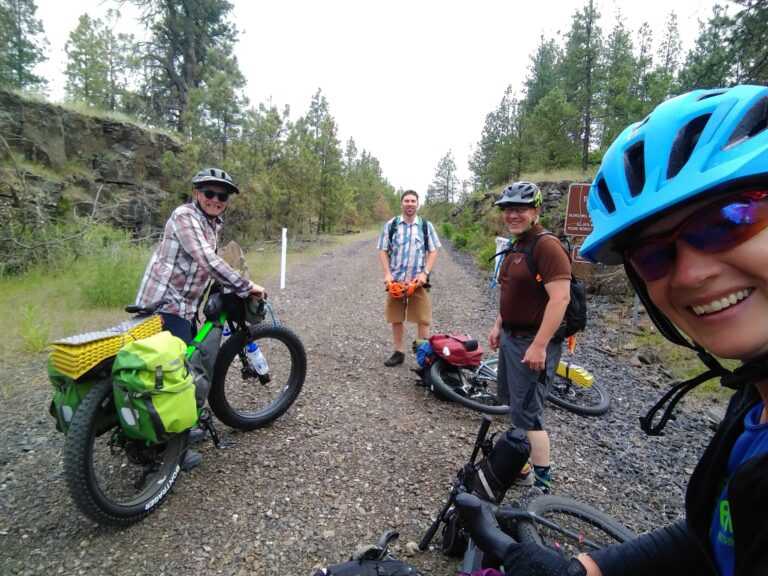
The vast majority of bikes sold today do not include a rack or other means for carrying stuff. Maybe this is why the messenger bag is such a big seller? It’s a shame, because for loads that don’t lie flat (say, like a gallon of milk or a half-rack of beer), messenger bags and backpacks are a real pain to use, especially if you have to travel more than a couple blocks. Carrying grocery-type loads on your bike is a great way to make your bike a useful bit of transportation.
There are more ways to carry loads on bikes than I have space for here. There are cargo bikes, cargo trailers, cargo bike add-ons, low-riding front racks, three-wheeled work bikes, saddle bags, frame bags and handlebar bags. The list goes on and on, and in the future I hope to cover different load-carrying solutions in these pages. For this column, though, I’d like to focus on the load-carrying options using the bike you already have hanging in your garage. Specifically, I’ll talk about how to get a rear rack on that bike and how to load it up. The idea is to transport a typical after-work run to the store: a gallon of milk, maybe a few vegetables, a six-pack of beer, maybe a fillet of fish, and say, a bag of rice. Assume we’re talking about two grocery sacks worth of stuff.
The Bike. Ideally, you’d have a ’90s mountain bike in your garage: the older the better. The older mountain bikes make the best conversions to city bikes. They have a great gear range. They’re tough, and most thieves won’t look twice at them. But any older, non-exotic bike will probably do.
Anyway, dig that old bike out and take a look at the rear fork ends, where the center of the rear wheel is attached to the frame. You’re looking for attachment points for a rack. Basically, these are either eyelets that have been brazed or welded to the frame, or, on aluminum bikes, they may just be threaded holes in the rear fork end dropouts. If you have these, then you’re golden-everything else can be hacked. If you don’t have these, then get on Craigslist, or wait for the article on cargo trailers.
The other option is to try a rack that hooks to your seatpost. However, if you’re hooking it to a bike that was not originally intended to handle a rack, it may not be a great idea to put a seat post rack on it either-especially if the post is carbon.
The Rack. Go to your local bike store (LBS) and pick up a rack. Tell them what kind of bike you have and the kind of stuff you intend to carry. Triangulation is a good thing. Triangulation makes stuff rigid. Rigidity is good in racks and when you’re hauling stuff.
The folks at the LBS will hook you up.
Get that rack on your bike. Make sure it’s attached well and it’s sturdy.
The Grocery Holder. Now we get to the fun part. Each of the options below is listed in order of cost. Each option can carry the load of groceries listed above.
- If you blew all of your money on a rack, then go find a milk crate. Now spend your last couple bucks on some zip ties and zip tie the crate to the rack. Be sure to overdo it. There is nothing low-brow or shameful in strapping a milk crate to your bike. They are sturdy; they are free; and they carry a lot of stuff.
- Wald is a company in Kentucky that has been making simple, sturdy bike stuff for nearly a century. Wouldn’t it be great to have at least one part on your bike made in America? Make it a Wald basket. You’ll have to go to your LBS and order one. My favorite is the Wald 42. While you’re there, get a cargo net; it’s a requirement for this basket. Zip-tie the basket to your rack and you are good to go.
- Roll Your Own: The Bucket Pannier. A “pannier” is a fancy word for a specialized cycling bag that is designed to hang off of a bicycle rack. A bucket pannier is a plastic five-gallon, food-grade bucket with pannier hardware attached. Bucket panniers are waterproof, super tough, and they make great stools. Total cost for this solution is around $20. See the website below for instructions that explain how to make them.
- Cheap panniers and Folding Baskets. I’m no fan. These seem like false economy to me. If you swear by these, I’d love to hear from you.
- Nice Panniers. What makes a nice pannier? Firstly, how the pannier hooks to the rack is important. Many cheap panniers are just two bags with a piece of connector sewn in, so they drapesacross the top of the rack. Well, that’s no fun if you only need one bag. Good panniers will attach both quickly and securely to your rack. Bad panniers will take a gob of time to click onto the rack and will still rattle. Another thing about good panniers is that they are waterproof. If it’s not submergible, it’s not waterproof. Panniers that meet these criteria start at about $120 a pair. That’s a lot. But if you get into utilitarian cycling you’ll love having made the investment in good bags like this, and if you don’t, they are easy to sell.
John Speare grew up in Spokane and bikes everywhere.
Don’t miss his blog:
http://cyclingspokane.blogspot.com
To make your own bucket pannier please go to:
www.bicycletouring101.com/BikeDIYPanniers.htm.


